
It’s been a while since I bought myself a Meizu MX4 Ubuntu Edition phone, but I finally found time and motivation to learn more about this new mobile platform from Canonical. I chose to port Allegro game library and my pet project, Return of Dr. Destructo, which is presently also nearing release on iOS and Android as a commercial app, to that platform. This post, however, won’t be very specific to my own projects, but can be used as a general set of answers to some problems with Ubuntu Touch-targeted development of OpenGL apps.
The worst thing about developing for a new platform is lack of coherent documentation. Even Windows Phone, with MSDN and Microsoft’s large workforce had this problem in the beginning, as it was impossible to google answers to even the simplest questions. In this post, I will try do document some peculiarities, problems and solutions of developing an OpenGL application (namely, a game) for Ubuntu Touch. If you’re more interested in developing apps with native UI (QML, QtQuick), then it will be slightly less useful to you, but you may still find something here.
Why choose Ubuntu Touch and where to begin
For me, as a game developer, Ubuntu Touch seems like a great platform not only for its openness, but also because native C++ apps are first-class citizen here. All system libraries and services have C/C++ interfaces and there is no need to write code in strange languages to create a window or make an in-app purchase. This is especially nice after Android with its horrible, horrible Java/JNI, but really, I also don’t need Objective-C in my life. Also, the official IDE based on QtCreator is good enough, even though it has its problems in UI design department. But it supports debugging C++ applications on device from day one – a feature Google still hasn’t managed to integrate fully into Android Studio.
To begin with, you will probably need a desktop version of Ubuntu or some compatible Linux distributive installed on real hardware. I tried using it with Virtual Box, but met several problems. Firstly, Ubuntu plugin for QtCreator uses OpenGL-powered QtQuick UI. This leads to QtCreator’s windows always being on the top of all windows, no matter what you do (other users report that things work fine in Vritual Box + XUbuntu). Secondly, I was unable to make Ubuntu IDE (that’s what Ubuntu’s version of QtCreator is called) to recognize my phone, even though the system itself was able to do so. The later, probably, was my own mistake, but I never got around to making certain of that, because I installed Ubuntu on real PC by then.
Ubuntu IDE says hello
To begin developing apps for Ubuntu Touch, go ahead and install Ubuntu SDK. The official manual recommends to add Ubuntu SDK’s PPA and then do apt-get update/install. Ubuntu Software Centre also has Ubuntu SDK in it, but maybe it’s of wrong version, or something – I haven’t tried it.
If you’re going to use emulator for development, you can create it from IDE according to instruction. I never managed to get emulator to work, but other people report success, so I guess I just messed up something (most probably, choose different Ubuntu Framework versions for emulator and the test program).
To run your app on the real device, you will need to turn on Developer Mode on that device. Unfortunately, this requires setting a PIN or other form of access protection. A strange, irritating measure, not required by any other platform!
Also, to make IDE see your phone, you need to wake and unlock it, by swiping away the lock screen (the one with a circle). However, entering PIN is unnecessary.
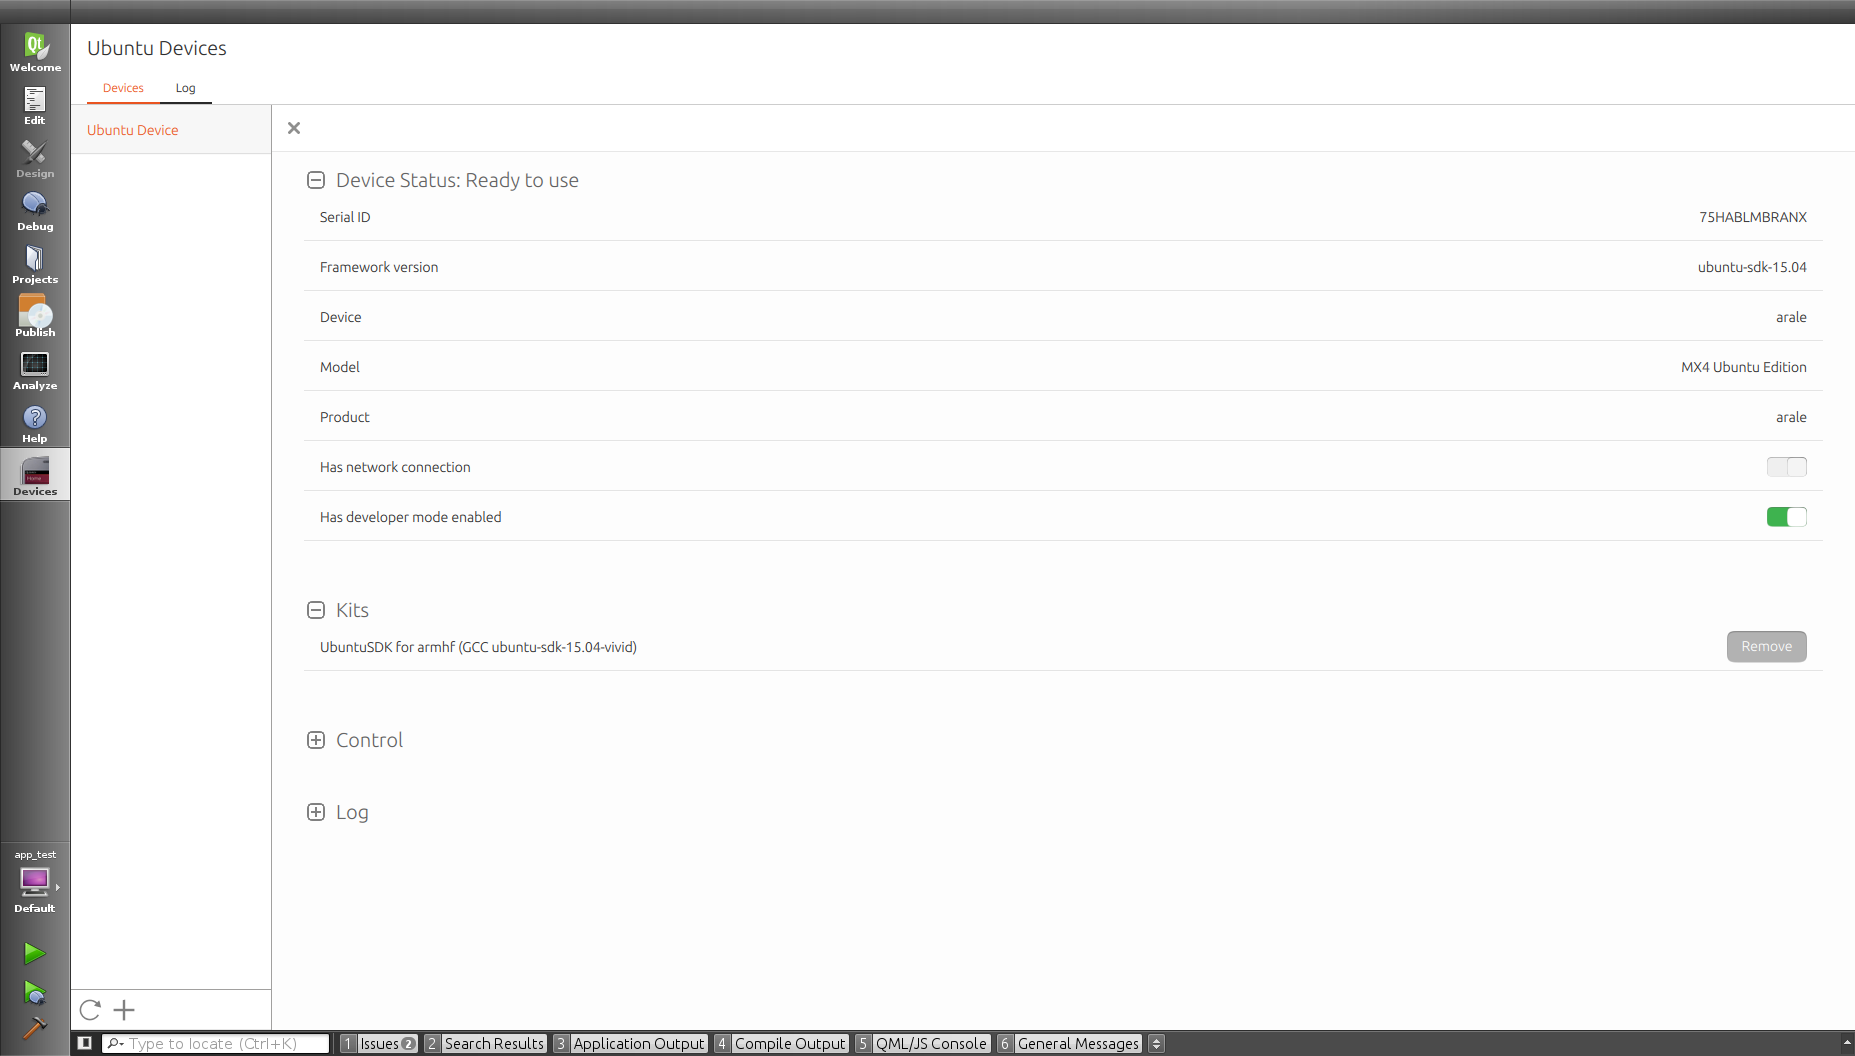
A device, when it’s ready for work
If IDE can’t see your phone even after all these manipulations, you will need to remember your Android experience and mess around with ADB configuration (since all existing Ubuntu Touch devices are originally Android-based). Posts on AskUbuntu (1, 2) suggest adding your device’s vendorID to ~/.android/adb_usb.ini.
What is chroot, and why do we need it to compile our apps
Update 04.09.2016: Modern versions of Ubuntu SDK no longer use schroot mechanism, but instead use LXD containers. Generally, you would work with them via the same IDE interface described below in passing. However, to operate them from command-line (for automation etc.) you’d need a different set of commands then for schroot (see the article linked above).
Those who are already familiar with conceptions of chroots can probably skip this section, which is aimed to dispel ignorance of this feature among developers not very experienced with Linux like myself.
Now, to cross-compile an app we need a lot of tools and libraries. All those tools and libraries need to be targeted toward device architecture. Preferably, they should reside in file hierarchy that is native to our host system, or at least so that build system could find them easily. Google solved this problem by setting some environment variables and creating their own build scripts (ndk-build) that wrap around make. This solution, while theoretically cross-platform, is somewhat fragile and plays badly with external build systems such as CMake.
Since Ubuntu SDK is only available for Linux presently, Canonical decided on another route. Ubuntu SDK creates a chroot for build purposes – basically, a substitute filesystem that is used as a root filesystem during building and debugging of an app. It’s a kind of light-weight virtual machine (though it really isn’t). When you run a program inside chroot, it’s like you have this special, purpose-build Linux with ARM-targeted compilers and libraries.
Ubuntu SDK creates chroots when you add a Kit (a combination of target architecture and framework version), so you don’t actually need to know a lot about inner workings of this mechanism. However, be prepared that creation of a chroot may take a long time, since its contents (a lot of packages!) are downloaded from network. In future, Ubuntu SDK plans to move away from chroots to a different sort of mechanism, but for now, relax and wait while your traffic is consumed by 1.5Gb download.
Things get interesting when you start to need libraries that are not part of default chroot installation. Official documentation only guarantees presence of default libraries on phone. You can link such libraries dynamically and expect them to be available on every user’s device in binary compatible versions. However, the default installation lacks a lot of libraries useful to a game developer, such as libpng, libfreetype or libogg. You will need to install them manually, and either link your app with a static version, or package shared one inside a click package (more on that later).
Now, you should know, that chroot does not not only provides a simple substitute filesystem. It also can and will create snapshots of it. A “source” chroot is immutable by default – all changes you make in its snapshots will be gone the next time you start a new chroot session. So, to use additional libraries consistently, you will need to modify source chroot itself. However, please notice, that changes in source chroot are not propagated to active sessions! And Ubuntu SDK sessions are known to persist even after you reboot your PC. So, you have to be mindful of that, and kill active sessions when you change source chroot and want all your changes to be used by IDE the next time you do something.
The correct way to install something in source chroot is to use “Maintain” button in “Click” tab of “Ubuntu” section in IDE options. This will provide you with a console where you can execute apt-get install libpng-dev:armhf etc. I’m not sure if Ubuntu IDE will restart its own sessions after you’re done with maintenance, but it probably will.

Here is the screenshot of that button, so you won’t get lost looking for it
But maybe you want to do something in chroot outside of IDE, for example, run a quick command in current session, or maybe write a script that will install necessary libraries in freshly created chroot. Necessary commands are mentioned in documentation, but I missed them there the first time I read it, so here they are:
click chroot -a armhf -f ubuntu-sdk-15.04 run COMMANDNAME – executes COMMANDNAME inside (non-source!) chroot’a and exits. Arguments: -a – chroot’s architecture, -f – framework version. You can’t install anything with this command, but you can run find, or cmake or something.
click chroot -a armhf -f ubuntu-sdk-15.04 install PKGNAME – executes apt-get install PKGNAME, changes source chroot
click chroot -a armhf -f ubuntu-sdk-15.04 maint – similar to “Maintain” button, gives you a console for changing the source chroot’a
And a few more important commands:
schroot –list –all-sessions – list all active chroot sessions
schroot –end-session SESSION_ID – kills specified session
If you installed a library into chroot via install or maint – don’t forget to kill sessions belonging to Ubuntu IDE. I lost a day once when I didn’t know that trying to make CMake see libraries that wasn’t quite there.
Mir
There is no X11 on Ubuntu Touch. However, there is Mir, a long-promised Canonical’s replacement for ageing X-Windows, and a competitor to Wayland. It’s not yet available on desktop by default, but on Ubuntu Touch devices, it’s the only way to go.
I must say that I like Mir. It has great API, which isn’t hard to learn, even thought there are little in the way of tutorials or examples anywhere on net. It feels like it was written by normal people instead of usual architectural astronauts mind-controlled by drunk Martians. For example, nearly every operation has synchronous and asynchronous version. And if you need to wait for a result of asynchronous version at some point, there is mir_wait_for call that does it! Also, if you use C++ version of API, you can pass std::function as a callbacks. That’s so great, I can’t properly articulate how great it is!
As I already mentioned, the biggest problem is lack of official examples of Mir client. The one in wikie only demonstrates the very basics, and in particular, does NOT demonstrate what we need – how to link OpenGL ES context and MirSurface. Google to the rescue!
Keep in mind, that Mir API is still somewhat unstable, so the example I linked to, while mostly sound, will not actually compile, because mir_surface_get_egl_native_window function is not present (anymore, or yet?!). Instead, to get a eglCreateWindowSurface-compatible windows from MirSurface, you will need to use a combination of mir_buffer_stream_get_egl_native_window
(mir_surface_get_buffer_stream(surface)).
Also, remember that Ubuntu Touch does NOT support OpenGL ES 1, only OpenGL ES 2 and 3. If you have legacy code from the time when dinosaurs walked the Earth and Gangam Style was the top-viewed video on YouTube, it will not compile.
When calling eglChooseConfig, don’t forget to add the following pair to a list of attributes
EGL_RENDERABLE_TYPE, EGL_OPENGL_ES2_BIT
And for eglCreateContext –
EGL_CONTEXT_CLIENT_VERSION, 2
Otherwise, you will be met with very informative errors like BAD_CONFIG or BAD_ATTRIBUTE. Dammit, we live in XXI century, and OpenGL still can’t tell you what exact attribute is bad, and what it didn’t like about config…
Input handling in Mir is implemented on per-surface basis via event handlers. A single event handler for all Surface events is installable, so you’ll have to filter incoming events by category yourself.
When reporting keyboard events, Mir uses the same key codes as X11.
Make it Click
And finally, you got your app to compile and now you’re ready to run it on device for the first time! Not so fast.
This is brave new world of mobile computing, so you can’t just stuff your executable into some random folder on device and run it from there! Or, actually, with Ubuntu Touch, you probably could (it’s just a Linux, after all, and you can call up terminal with sudo if you need full access), but it’s not the proper way, and certainly not the way IDE does things.
What you need, is to package your app, along with its data files and install that package on device. Now, DEB is old-fashioned and RPM been out of style since Mandrake Linux changed name. The new kid on the block is called Click and that’s the kind of packages Ubuntu Touch prefers. Ubuntu IDE will create the package for you automatically, based on INSTALL directives in your QMake or CMake file. However, you need to know and do a few things.
The good thing about Click, is that it will be installed in its own sandbox. This means we can create any kind of filesystem inside it. For example, if your app is a port from desktop Linux, you may not even have to change your INSTALL section: you app will be installed into /usr/local/bin (or whatever path you usually prefer) and it will be able to find its data and dynamic libraries at usual paths (please note: if you used any additional shared libraries, not available in default chroot setup, you will need to package them along with your app, by placing them inside /usr/lib/ or /usr/local/lib/ directories; if you do so, your app should be able to find them at run time).
However, if your app is an immigrant from Windows world or you just don’t want to think about paths, nothing stops you from plonking executable in the root folder, and placing data folder beside it for easy access.
Before IDE can create a click package for you, you will need to create three new files:
a) manifest.json – description of your app, what it does, and who to blame when user’s phone goes up in flames. In “hooks” section, this file gives names of two following files (they can actually be whatever you want).
б) AppName.desktop – description of how your app looks for Unity desktop: name, icon, splash screen settings (see below).
в) AppName.apparmor – list of permissions, analogue of permissions in AndroidManifest.xml.
There are templates available for all these files, but I will show their contents here.
manifest.json:
{
    "name": "APPNAME.DOMAINNAME",
    "description": "DESCRIPTION",
    "architecture": "ARCH",
    "title": "TITLE",
    "hooks": {
        "APPNAME": {
            "apparmor": "APPNAME.apparmor",
            "desktop":  "APPNAME.desktop"
        }
    },
    "version": "VERSION",
    "maintainer": "NAME SURNAME ",
    "framework" : "FRAMEWORK"
}
You can easily edit manifest.json via built-in GUI editor in Ubuntu IDE.
AppName.apparmor:
{
    "policy_groups": [
        "networking",
    ],
    "policy_version": 1.3
}
Also editable from IDE, and there is a list of all possible permissions there.
AppName.desktop:
[Desktop Entry]
_Name=VISIBLE_APP_NAME
Exec=EXECUTABLE_NAME
Icon=ICON
Terminal=false
Type=Application
X-Ubuntu-Touch=true
Dekstop file is not editable in IDE, or, rather, there is no special editor – you can edit it as plain text, of course. This does not seem like a problem until your gaze hits the bottom line. “X-Ubuntu-Touch”? What other “X-Ubuntu-WHATEVER” settings are available, I wonder? The answer is, nobody knows. There is no centralised, complete list of supported settings, only a disparate set of documentation, each piece describing a few possible settings.
The general format description of desktop file is available here, however, it does not contain X-fields, since they are Ubuntu-Touch-only addition.
X-Ubuntu-Touch=[true/false] – this is a “temporary” solution that marks an app as available for Ubuntu Touch, not desktop.
X-Ubuntu-Supported-Orientations=[portrait/landscape/primary] – possible screen orientations of your app (primary, as I understand it, is portrait for phones and landscape for tablets). The list is taken from here. Official documentation about shell rotation only names the first two variants of value. If your app supports any screen orientation, don’t specify this key at all.
X-Ubuntu-Gettext-Domain=[?] – something related to app localization, I can’t quite discern the list of possible values from docs.
The following fields specify splash screen settings:
X-Ubuntu-Splash-Show-Header=[true/false] – set to true if you want to show some text on splash screen.
X-Ubuntu-Splash-Title=[TEXT] – specifies text to show on splash screen (usually, app name).
X-Ubuntu-Splash-Image=[FILENAME] – image to show on splash screen. It will be shown in its real size, without stretching or fitting.
X-Ubuntu-Splash-Color=[COLOR] – solid color of splash screen background in QColor::setNamedColor format.
X-Ubuntu-Splash-Color-Header=[COLOR] and X-Ubuntu-Splash-Color-Footer=[COLOR] – colors for top and bottom part of splash screen; a gradient will be drawn between them.
I’m not sure if it’s a complete list of possible settings. Not even a dip into Unity8 source code brought any insight: I only found a place where a few of settings are processed, but others must be used somewhere, too, because they DO work.

manifest-file editor. I wish there was one like that for desktop files
Ubuntu IDE: CMake vs. QMake
Now, you can do everything by hand if you want to: write your own makefiles, use console gdb for debugging, manually call click to upload your package to device etc. But we modern programmers are used to facilities provided by IDEs. And less alien build systems, like CMake or QMake.
If you’re a fan of QMake, I’ve got good news for you: you project will probably compile and run on Ubuntu Touch from Ubuntu IDE with very little modification! Just load a necessary module with load(ubuntu-click), add manifest files described above to your project, and everything should be fine.
With CMake, everything should be simple, too, at least, in theory. All you need to make your app run on phone, is to add a single line with path to manifest file to your CMakeLists.txt (you will also need to install manifest, desktop and apparmor files):
set(UBUNTU_MANIFEST_PATH "manifest.json" CACHE INTERNAL "Path to manifest file")
VERY IMPORTANT: be sure to mark this variable as CACHE, or Ubuntu plugin will be unable to find it! It will not complain or show errors, but things won’t work as expected.
Also, I had troubles with specifying path to manifest using CMake variables. For example, a value of “${CMAKE_SOURCE_DIR}/manifest.json” has the same effect as no value at all.
But even if you have it all set up correctly, Ubuntu IDE currently has a bug that makes it create two run configurations for CMake apps instead of one. The first one will have the name of your add_executable target. This is a bad, non-working configuration, and it is selected by default! When it is selected, IDE will build and package you app for ARM platform, and then stupidly try to run in on desktop, leading to such error in Application Output:
Selected architecture arm is not compatible with reported target architecture i386:x86-64
Architecture rejected target-supplied description Debugging has finished
To avoid this, go to “Run” tab of your project in Projects page and select the second configuration. Its name will be taken from manifest.json file, from “hooks” section. If it is the same as the target’ sname from add_executable, a digit ‘2’ will be added at the end (i.e., “cmake_test2”). This is a good configuration, and if you use it, your project should be deployed to device (or emulator) and run on it. If this configuration is not present, then you did something wrong (for example, forgot to specify UBUNTU_MANIFEST_PATH, or made it point to non-existent file, or used ${CMAKE_SOURCE_DIRECTORY} in path).
Another bug awaits you if you want to use Dependencies mechanism provided by QtCreator for its Sessions. If you add your library as a dependency for your Ubuntu Touch app, the build will fail, because IDE will try to process deployment step of library project, but, being unable to find maniest.json file (which is not needed for a library), fail. IDE developers say that this use case is not supported, and you should add your libraries as a sub-projects for your app project.
As for the first bug, I have reported it to Ubuntu SDK IDE bug-tracker.
“Bad” run configuration. You can see that it has “Command line arguments” and “Working directory” settings – a clear sign that IDE is going to run your app on desktop instead of phone, never you mind “Deploy to Ubuntu Device” step.
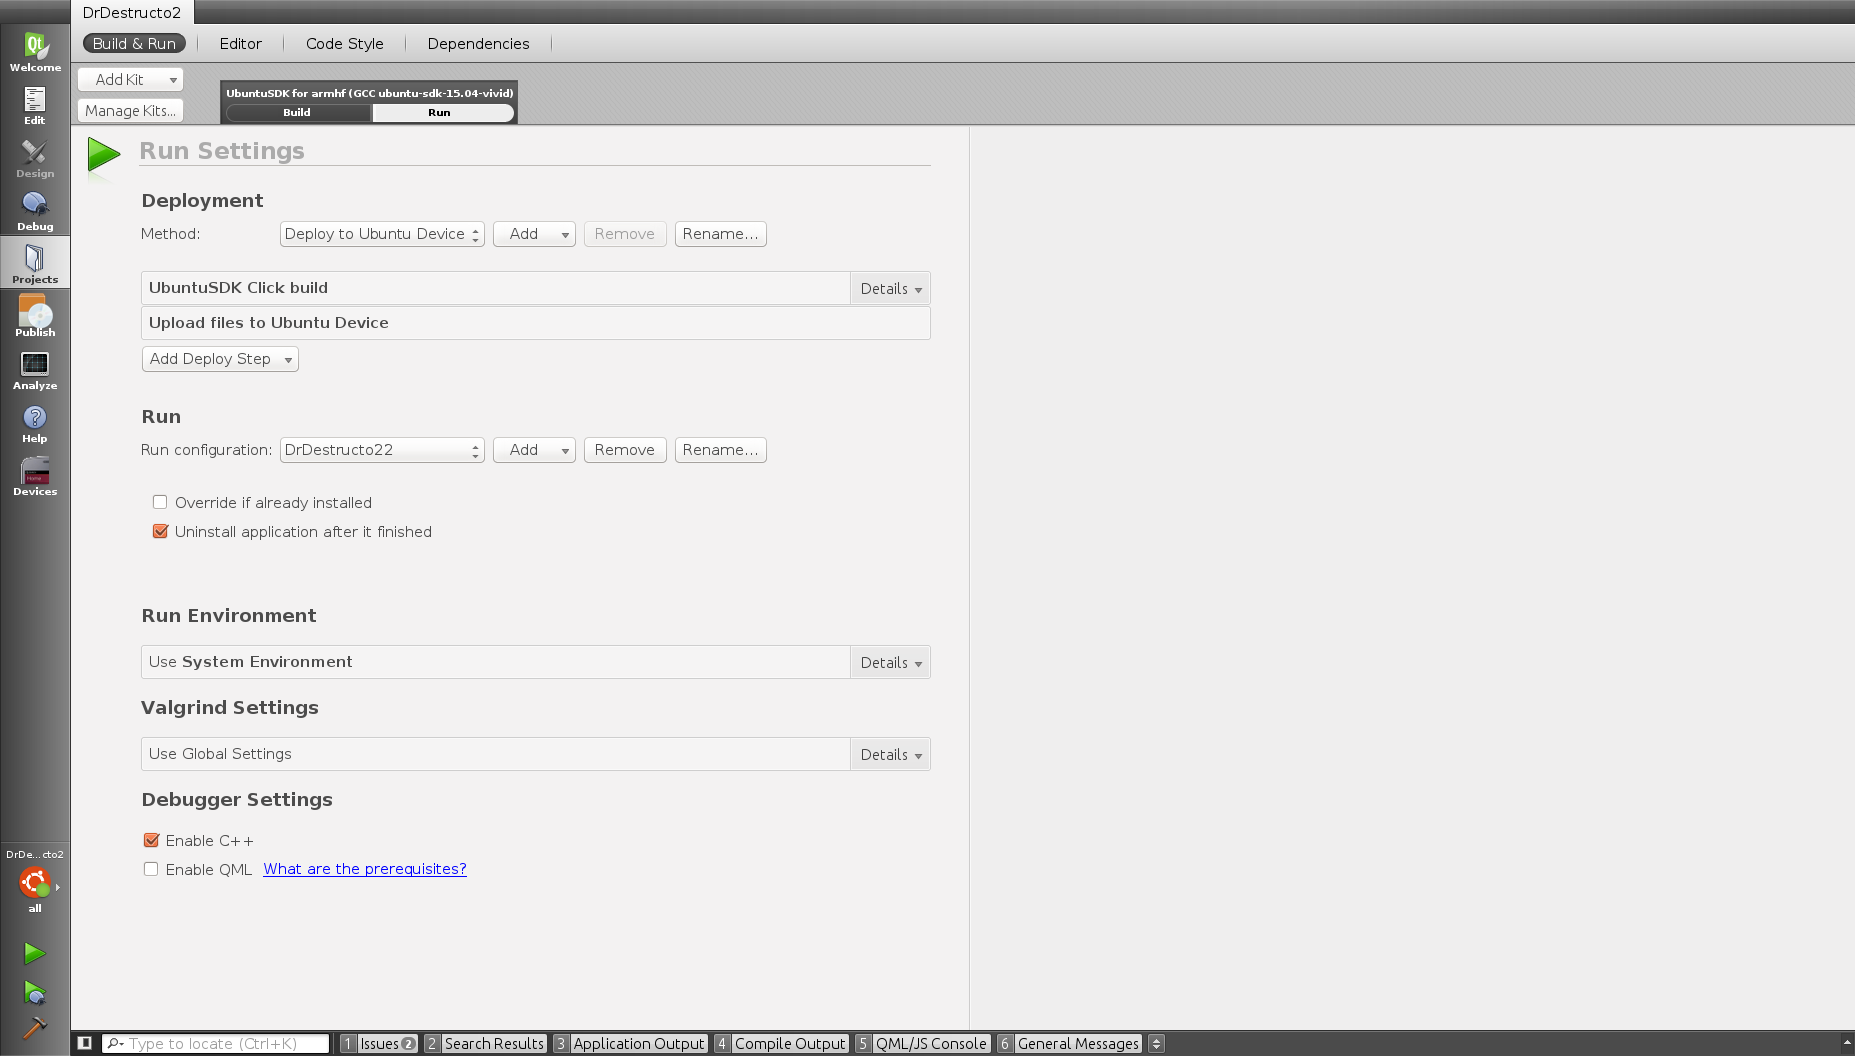
“Good” configuration. As you can see, it has different set of options.
A small trick I wish I knew before
This is not Ubuntu Touch specific, but I just wanted to share that trick, because I spent a lot of time wishing for such option about a year ago.
Sometimes, you want to link you app specifically with a static library, or a set of static libraries. Of course, gcc has -static flag, but it’s not very convenient, and also I think it doesn’t quite work in some circumstances. Now, I know you can do this instead!
gcc yourprogram.o -ldynamiclib -l:libstaticLib.a
In this case, the first library will be linked in default manner (preferably, dynamic, but static if only static is available), but the second one will always be static, even if dynamic is also present in library path! Keep in mind, that you need to specify full name of library after colon, with both ‘lib’ prefix and ‘.a’ extension.
This works in QMake, but in CMake, you can just write ‘libname.a” instead of ‘libname’ in target_link_libraries directive. Hooray for CMake.
In conclusion
Developing for Ubuntu Touch right now is not easy, mainly because of lack of documentation and examples. The only component of system that gave me no problems is Mir. Also, because all software involved is still in active development, sometimes things will break after a routine update. For example, my chroot was broken for a day (not totally, but it would ask for an upgrade every time I started IDE, and than proceeded to fail to upgrade), and I had to rebuild it after the fix was released, wasting some time.
However, it’s not very hard, and it’s certainly interesting 🙂 I hope more people will port their apps to Ubuntu, so maybe that platform will gain some traction and not follow the path of Firefox OS into oblivion.
You can find some help for your Ubuntu Touch problems at the following places:
AskUbuntu – StackOverflow for Ubuntu in general. Ubuntu Touch questions usually get answered, but you will have to wait.
Ubuntu Phone Mailing List – this mailing list is mostly for users of Ubuntu Touch. You won’t get many answers to your developer woes here, but if there are some problems with your device, this is the place to go to.
#ubuntu-app-devel IRC – IRC channel for Ubuntu Touch app developers. If you manage to catch some of experienced developers online, they can usually help you. But usually its very quite in there (as in most tech IRC chanels I know). Hint: do not be afraid to highlight appdevs using the keyword from channel’s theme!
Also, there is a mailing list for developers, but it looks dead. There are some other Ubuntu Touch-related channels on IRC, see full list on Wiki.
This post might acquire a sequel: I have yet to fix some problems with my game and integrate in-app purchases via the new libpay API. I’m sure I will hit more interesting problems and bugs to describe to you in process!

And here’s a screenshot of my game running on a real Ubuntu Touch device! As you can see, I haven’t yet managed to get rid of status bar on top of the screen – people on IRC say it’s a bug in current version of OS
Thanks for the writeup! I’m also trying to start writing something for Ubuntu Touch and this post has been useful.
I’m glad you found it useful. Some time has already passed since I wrote it, so some bits might be obsolete (I’m not sure if development moved to using LXC containers or not).
Really good and helpful article man! Resharing and bookmarking.
Thank you. I hope it isn’t obsolete too much yet!
I am not a developer but this is an exceptionally well written guide and very helpful for all of us dreaming of being able to put something back into Ubuntu. Thanks
Thank you!
I had developed things for Ubuntu Phone, but knowing it’s so easy to develop an OpenGL ES application makes it even better. Great article, I’ll use this as a heads up for my game engine.
It would be great to have more complex games on Ubuntu Phone! Though keep in mind, that while Mir is nice and all, you still have a chance to run into hardware incompatibility in details, for which Android hardware is well-known 🙁
Thank you MaxEd for taking the time to write this article, it has Helped me too as I am just starting to write some apps, and I hope a small game using the Bacon2D engine
You’re welcome! The more good apps and games we have for Ubuntu Phone, the better!
Thanks, and do not forget to BENCHMARK your game under the 3 OSs , divide it by price of the device and or a synthetic test as they cannot be the same device and tell us. Probably yours will be if not the first one of the few “all mobile platforms” games.
And it will help to know what OS is better in cheap devices, because the 50 USD Android phones are going to be “a thing” and if Ubuntu phone is faster (or close) on those it can have a chance.
It won’t be _all_ mobile platforms since there will be no support for Windows Phone (I’d be glad to add it, as the company I work at has good experience with this platform, but Allegro does not support DX11, and adding it is too much hassle for me).
That being said, I can tell even without the benchmarks that Ubuntu Touch is not ready for cheap devices due to optimization problems. It even has UI stutters on MX4, which was a flagship device not long ago, and in my experience, my game has some problems with playing sound on it (choppiness). Maybe future releases, or releases specifically aimed at lower-specced phones can be faster, but I’m not seeing that yet.
The X-Ubuntu-Touch line is to mark if it is allowed to display on the phone/tablet – as these are convergent the same desktop files are used as the old desktop versions of Ubuntu and with configuration you can set up the phone to install .debs or apt-get this makes sure that the programs only built to run in mir would be displayed
Thank you for the clarification, this is what I expected.
This might help with fullscreen (removing statusbar) https://github.com/kenvandine/pathwind/blob/ubuntu/main.cpp
Some other desktop file options:
https://developer.ubuntu.com/en/phone/platform/guides/splash-screens/
Lock rotation: https://wiki.ubuntu.com/Unity8/FullShellRotation
https://lists.launchpad.net/ubuntu-phone/msg01465.html
But yeah, couldn’t find one place they were listed out..
I do not use Qt in my app, so I’m not sure how this link is applicable (I guess I can look at Qt sources to see what are they doing to make it work, though).
I think basically people are making a “wrapper” that will display a fullscreen element and then put their content inside, also look at panda love, that one is qml – I think the relevant thing is qtquick.window setfullscreen – don’t know only seen it done in qt or qml.
The unfortunate thing about Mir is that its threading model is completely insane. To quote the docs:
“There is also a chance that different events will be called back in different threads, for the same surface, simultaneously.”
I haven’t encountered it yet, but it sounds like it may complicate things! Still, I guess you can put all events into your own lock-protected queue and then process them at once in one place? This should work for simple cases, at least.