In this post, I would like to tell a few stories about the process of development of Return of Dr. Destructo and share some views on game architecture and cross-platform development
I often use the same trick for self-motivation when working on a pet project: a file called Progress.txt, where I write daily what I have accomplished. Combined with oft-cited advice for writers, that you should add at least a line to your work every day, it does wonders. During the first, the most active period of development, I really worked on the game daily, with only a few exceptions for the holiday abroad and other things like that. Such a file makes for an interesting reading a month, or a year later. Or after the game’s release, as is the case. So, let’s scan through it together and see if there is anything interesting there. I’ll try to only pick entries that have some story behind them. Also, there will be pictures 🙂
02.08.11: Fiddled around with sky, water, sun and moon
The development began in 2011, after another, bigger pet project petered away. I wanted to take on something simpler, something I could see to the end, just to prove to myself that I can do it. To create a PC version of “Island of Dr. Destructo” was a long ago idea of mine, because I remembered this game with fondness from my childhood, when I discovered it among others on aircraft-related collection. The main feature that struck me as unique then was the destructible level. When an enemy plane fell, it destroyed a chunk of level’s target right where it hit it! This is a rare feature even now, but then – it was astonishing.
I began by creating some routines to draw sky and water. The original game has night/day cycle, with moon and sun passing through the sky and stars coming out at night. I wanted to make the picture a bit more modern, so I added a subtly changing gradient to the sky and made stars appear slowly, rather than wink in or out all at once. I did this by supplying key points for all parameters (top gradient color, bottom gradient color, degree of transparency for the stars etc.) and doing a linear interpolation in between.
The water reflects sun, moon and stars. Initially, I wanted it to reflect everything that was in the sky, including enemy planes, but this ended up looking bad, so I opted for a simpler, but cleaner variant.


10.08.11: Finished refactoring
While I was mucking around with the sky, the project’s code lived in a few classes created and called directly from main(). But now the time has come to think about architecture. All of my previous experience led me to believe that hardcore OOP approach is a bad fit for game mechanics. Its complex class hierarchies and well-isolated layers are too rigid for this area, where often a small change in requirements may lead two previously unrelated pieces of code to become highly involved with one another, violating all abstraction.
On the other hand, to abandon all encapsulation and abstraction wholesale is to take the first step on the road to development hell.
Around the time I began programming “Return of Dr. Destructo”, my lead programmer at work told me about the component approach to architecture. I must confess I did not understand his ideas fully then, but, using my then-current understanding I managed, in a few evenings, to come up with a kind of architecture I liked. I’ll go ahead and say it proved to be good, because I never had to rewrite a huge chunk of it and there is only a very small number of really ugly hacks, despite three years of development. But if you’re thinking of Unity, then no, what I came up with wasn’t quite like that.
So, how is the game’s architecture organized? Everything that is related to a single sub-system (render, sound, physics, game mechanics) is stored in a separate Component. There is also a GameObject Component, which does little more than serve as a common parent to all other Components of an object, by storing IDs of children. Yes, I did use IDs instead of any kind of references, which proved to be a bad idea, because the code to access a Component was unnecessarily wordy, but not bad enough to rewrite it. Unlike Unity, I made my Components very simple: they are just structures that store some data with public access and no methods of their own, but a few helpers.
During a frame, all Components of a given type are processed by a Processor object. Physics processor calculates movement and collisions, Graphics processor updates animation timers and renders frames on screen, etc. A processor only has access to one type of Component.
Since processors can’t access Components that are not their own, some duplication of stored data becomes unavoidable. For example, and object has to have physical and graphical coordinates, even though in this game they are always coincide. There is no common place to store such shared data, so someone has to copy it from one Component to another at appropriate time. Such inter-Component interactions, along with other operations that require access to multiple types of Components at the same time, are coded in Game States. Mostly, all game mechanics live in the GameStateLevel class, which is responsible for everything that happens during the active phase of level.
This class’s file might look a bit scary with its two thousands lines of code, but a lot of it are just some helper classes, which should probably be moved to separate files, but I’m too lazy to do that. The main state’s class itself chiefly consists of methods like ControlsToPhysics, PhysicsToSound, which transfer data from one component to another while applying some transformations.
Unlike mechanical part of the game, UI and Game States are written a bit more closely to the standard OOP. I use something like Pushdown Automata for managing states, a state machine with a stack of active states, so I can easily return from the current state to the previous one. Unlike the basic Pushdown Automata, my implementation has some additional features, necessary for my goals. First, only the topmost state receives frame updates. This allows me to pause the game by stacking another state on the top of level’s state. Second, I can remove not only the topmost state, but any state from a stack. All states above it are removed too, as they are considered children states of the removed one. This is done, so the player could press “Exit to menu” button in Pause state (which is stacked above Level state), and go directly to Menu state.
My game is quite simple, so there is no need to separate UI and Game States, but in a more complex cases this needs to be done.
12.08.11: Started to work on deserialization system for XML files (basics already work)
16.08.11: Completely screwed up deserialization. The whole damn thing need to be rewritten from scratch
18.08.11: Finished mucking around with deserialization. It works, but it’s still fugly
Deseriaization and C++ is an often discussed topic, with no clear answers until some new standard give us at least compile-time reflection. Before starting work on “Return of Dr. Destructo”, I already had some experience with several in-house serialization systems, as well as with Boost.Serialization (boy, was that an Experience…). So I had a clear understanding that there is no simple, easy to use way to solve this problem, However, I tried to roll out my own system, by limiting the scope somewhat.
First of all, I had only to support deserialization. There was no need for the opposite process. Second, I only supported one format – XML. Third, I relaxed the usual condition that deserializable field should only be mentioned once, during its declaration. Indeed, the whole code for deserialization was to be written in a separate class. But there were some added complication. I wanted an inheritance support, so I could take already deserialized object, copy it with a new name and then override some fields.
A bit of an aside: why did I needed deserialization at all. A Prototype, in my personal jargon, dating back to the first workplace, is a class that contains data that can be used for initialization of an object of some other class. For example, a Monster class might have a MonsterPrototype class that describes name, initial HP, speed and attack values for a Monster. A concrete object class might store a reference to Prototype, or it might just copy all data during initialisation, so it could later be overridden. “Return of Dr. Destructo” has Prototypes for all Components of all objects, so I needed to load a description of those Prototypes from XML files.
The system I ended up with wasn’t particularly good. It was more wordy than I liked, and hard to read. On the other hand, it did what I wanted it to do. Take a look at an example:
  // Declare a deserialzer of named object of type SGraphicsProto with a string ID. This is a Graphics Component prototype
class GraphicDeserializer : public XMLNamedObjectDeserializer<SGraphicsProto, std::string>
{
      // Declare a deserializer fo a single animation (it has an integer ID, typedef'd to AnimationID)
	class AnimDeserializer : public XMLNamedObjectDeserializer<SAnimProto, AnimationID>
	{
          // Declare a deserializer for a single animation frame. They don't have IDs, so they can't be inherited
		class FrameDeserializer : public XMLObjectDeserializer<SAnimFrame>
		{
		public:
			FrameDeserializer() : XMLObjectDeserializer<SAnimFrame>( "Frame", false )
			{}

              // The Bind method links fields of a newly created SAnimFrame object to XML tag attributes
			void Bind( SAnimFrame & object )
			{
                  // Attrib_Value are simple attributes that are read directly into field without any conversion
				Attrib_Value( "X", false, object.x );
				Attrib_Value( "Y", false, object.y );
				Attrib_Value( "W", true, object.w );
				Attrib_Value( "H", true, object.h );
				Attrib_Value( "FlipH", true, object.flipH );
				Attrib_Value( "FlipV", true, object.flipV );
                  // Attrib_SetterValue - are written by calling SetX2 and SetY2 functions, which perform
                  // some conversion.
				Attrib_SetterValue<SAnimFrame, int>( "X2", true, object, &SAnimFrame::SetX2 );
				Attrib_SetterValue<SAnimFrame, int>( "Y2", true, object, &SAnimFrame::SetY2 );
			}
		}m_frameDes;

	public:
		AnimDeserializer()
			: XMLNamedObjectDeserializer<SAnimProto, AnimationID>( "Animation", false, "ID" )
		{
              // Here, we notify parent deserializer that we have a special deserializer for frames
			SubDeserializer( m_frameDes );
		}

          // The same goes for SAnimProto object
		void Bind( SAnimProto & object )
		{
			Attrib_Value( "FPS", false, object.m_fps );
			Attrib_Value( "Dir", true, object.m_dir );
			Attrib_Value( "Reverse", true, object.m_reverse );
			Attrib_Value( "FlipV", true, object.m_flipV );
			Attrib_Value( "FlipH", true, object.m_flipH );
			Attrib_Value( "OneShot", true, object.m_oneShot );
			Attrib_Value( "SoundEvent", true, object.m_soundEvent );
              // Here, we specify that all deserialized frames should be added into animation via AddFrame method
			m_frameDes.SetReceiver( object, &SAnimProto::AddFrame );
		}
	};

private:
      // XMLDataDeserializer - a class for reading some data from XML without creating a new object
	XMLDataDeserializer m_imgDes;
	XMLDataDeserializer m_bgDes;
	XMLDataDeserializer m_capsDes;
	AnimDeserializer m_animDes;

	void Bind( SGraphicsProto & object )
	{
          // This value is read directly from tag.
		Attrib_Value( "Layer", false, object.m_layerID );
          // We will add new animations to SGraphicsProto via SetAnim method
		m_animDes.SetReceiver( object, &SGraphicsProto::SetAnim );
          // Animations are named objects, and therefore we can use inheritance with them. To make it work,
          // let's specify a function that finds and returns a previously deserialized animation by ID
		m_animDes.SetGetter<SGraphicsProto>( object, &SGraphicsProto::GetAnim );
          // From this tags, we shall only read a single attribute
		m_imgDes.Attrib_Value( "Path", false, object.m_image );
		m_bgDes.Attrib_Value( "Path", false, object.m_imageBg );
		m_capsDes.Attrib_SetterValue<SGraphicsProto, int>( "ID", false, object, &SGraphicsProto::SetCaps );
	}

public:
	GraphicDeserializer()
		: XMLNamedObjectDeserializer<SGraphicsProto, std::string>( "Graphic", true, "Name")
		, m_imgDes( "Image", false )
		, m_bgDes( "Bg", true )
		, m_capsDes( "Caps", false )
	{
		SubDeserializer( m_imgDes );
		SubDeserializer( m_bgDes );
		SubDeserializer( m_animDes );
		SubDeserializer( m_capsDes );
	}
};

  // A Root deserializer, which basically checks that XML file starts with Graphics tag and then deserializes the rest using SGraphicProto deserializer
class GraphicsDeserializer : public RootXMLDeserializer
{
public:
	GraphicDeserializer m_graphicDes;

	GraphicsDeserializer()
		: RootXMLDeserializer( "Graphics" )
	{
		SubDeserializer( m_graphicDes );
	}
};

  // And this is how we use it all:
void GraphicsProtoManager::LoadResources()
{
	GraphicsDeserializer root;
      // The whole SGraphicProto could be inherited too, so let's specify a setter and a getter for them
	root.m_graphicDes.SetReceiver<GraphicsProtoManager>( *this, &GraphicsProtoManager::AddResource );
	root.m_graphicDes.SetGetter<GraphicsProtoManager>( *this, &GraphicsProtoManager::GetResource );
      // XMLDeserializer reads an XML file and passes control to Root deserializer
	XMLDeserializer des( root );
      // Go!
	des.Deserialize( "Data/Protos/graphics.xml" );
}
Later, I wrote a slightly better deserialization system, for another project, which was later abandoned. Maybe I’ll come back to it someday.
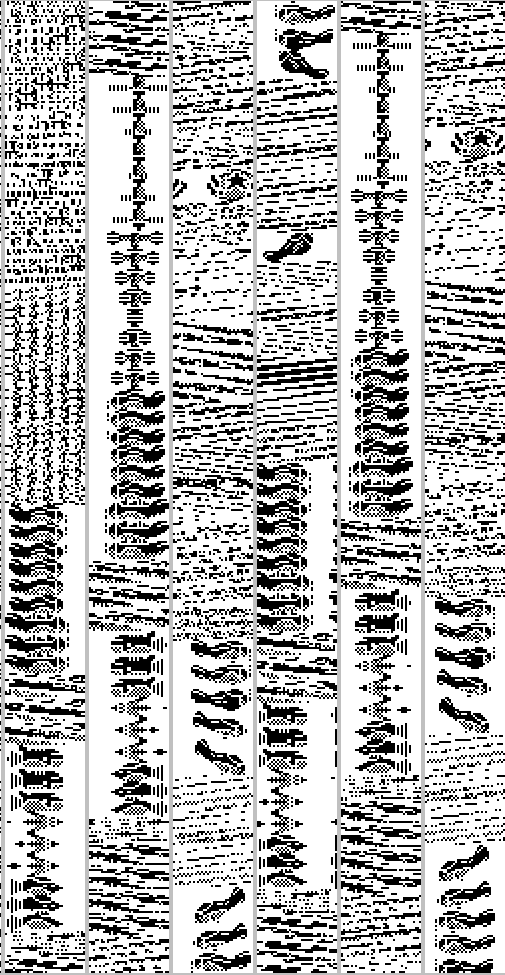
19.08.11: Created two prototypes for enemy planes and ripped sprites for them
It’s always nice to have something on screen which looks like a real game art. Unfortunately, I’m no kind of artist myself. So, I decided to rip all necessary sprites from the original game, and later replace it with something more interesting. Large static objects, like ships and castles, were easy. I just made a screenshot of emulator’s window and cropped out the image. Unfortunately, this approach wouldn’t work with animated plane sprites, it’s just too hard to capture all frames in this way. Here, I used a very interesting feature of EmuZWin emulator, which allows the user to look at the content of memory, and not just that, but to interpret is as graphic. By playing around with width of a sprite, I was able to rip most of necessary graphics from the game in this way:

Later, I just painted sprites with the colors from the original game, stuck them together in textures and fiddled with animation parameters until everything looked close enough to truth.
25.09.11: RELEASED VERSION 0.4
This version was the first public release I made available on my site. The game was more or less working at this point: you could control your plane, there were a few enemies for you to shoot down, falling planes destroyed chunks of level’s target and if you created enough holes in it, it sunk and level ended. So, the time from the beginning of development to the first playable version was a little under two months.

23.11.11: Started work on the downed helicopter object
Oh, those copters! If you played the original game, you must hate them just like I do. Not only these little buggers can change their flight direction suddenly, they also fire rockets, and, to make it worse, after you shoot them down they become even more dangerous! Unlike all previous enemies, helicopters retain the ability to collide with player’s plane after you hit them. They also start to fall down in a quick, dangerous zig-zagging pattern. The game designer’s motivation for these enemies is obvious after you play the game for a while: an experienced player would usually attack enemy aircraft from below, because it’s easier to hit it this way, and also you can take an evasive action more easily if things go wrong. Helicopters and, later, bombers make this tactic much harder to execute.
Scripting helicopters’ behaviour was somewhat of a challenge, because they have a far more complex array of tricks than all enemies I created up to that point, and my system for defining enemy behaviours wasn’t quite up to the task, so I had to extend it.
02.12.11: Finished work on Aiming Aid
After I put several levels and enemies into the game, it became obvious that it was even harder than the original. The original game had a very rough collision detection, which played into player’s hand most of the time, as it was easier to hit targets with bullets. In the remake, you could be off by just a few degrees, and miss the target completely. I wasn’t able to compensate for this by making the controls more fine, so instead I took an other option. Now, bullets you fire would not fly directly ahead, but could change their initial angle a little, so as to hit the enemies with higher probability. I had to play around with the system’s parameters, but in the end it made the game more fun, so in the final version Aiming Aid is on by default (but you can turn it off in Options/Gameplay menu, if you think it makes the life too easy for you!).
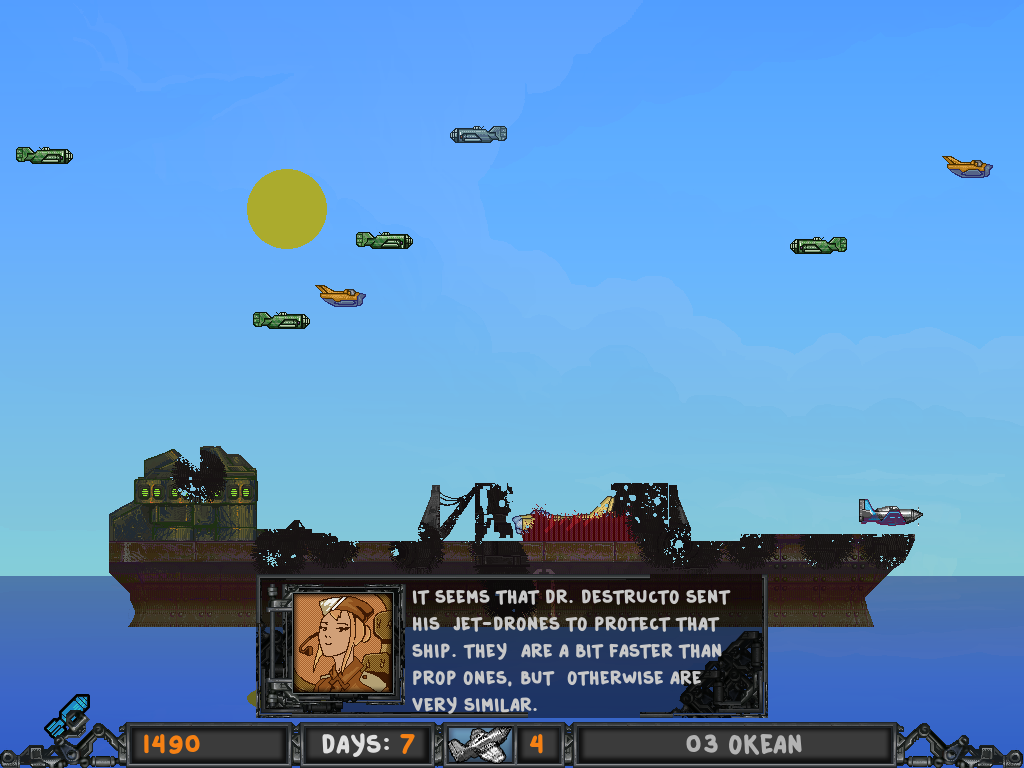
04.12.11: Added inter-level briefing, added commentaries during the level
I have a bad habit: I want to add a story to nearly any game I create. Back in 2006, we even worked on an Arcanoid with a storyline with my friend. Often, this is unnecessary, because not every game needs characters, dialogues and exposition. But I wanted “Return of Dr. Destructo” to have a bit more flavour than the original game, and also I needed to give players a pause between levels, a resting place. So, in went Player White, Mission Control, High Command, Evil Henchman, Dr. Destructo and their slightly funny banter. In this dialogues, I tried to explain a bit why does the player needs to sink next level’s target, and also to warn him of the new enemies he will meet.
In-level comments arose from another design decision. In the original game, falling enemies destroyed a nice, rectangular chunks of target. When a hole reached water level, it was marked by a fountain, and if the target had three fountains, it sunk. However, in remake explosions instead removed irregularly shaped chunks, and therefore it become impossible to draw these nice fountains. Still, I needed a way to tell the player how close is he to winning a level. Thus, in-level comments were born. It’s not explained anywhere in the game, but it should soon become obvious that each level has exactly three comments, and after you have seen the last one, there is a good chance a few more hits would send target to the bottom of the sea. Later, I also added a level progress indicator to the lower-right corner, below level’s name.

06.02.12: Finished work on Music component, using irrKlang instead of Allegro sound API
I have to confess that I usually turn off music in games. Even a melody you love would start to get on your nerves if you have to listen to it for 20-60 hours, and my tastes differ greatly from the norms of game music (why wouldn’t anyone create a game with classic rockabilly soundtrack? I would play it SO hard!). So, I delayed integration of music and sound into my own game for as long as was possible. Still, the time came…
I make an extensive use of Allegro game programming library. It may be not as widespread as SDL, but I like its API more, and I used it ever since I discovered a DOS version in 1999, when I began to learn C/C++ after using QuickBasic and FutureLibrary during my school years.
But I didn’t like Allegro’s sound API. It looked very complicated, and all I wanted was just to load and play a sound sample. So, after some hours of searching, I decided to use irrKlang library, which seemed much more simple and well-suited for my tasks. This proved to be an error: irrKlang leaked a small amounts memory when playing Tracker files (the game uses Impulse Tracker format for music). The library’s author told me he wasn’t going to fix this problem, and it was a closed-source library, and then I discovered bad problems with Linux version. So in the end I had to ditch it, and learn to use Allegro’s API.
Why does the game uses Impulse Tracker format? I’m not a Tracker music fan, in the sense that I never had much to do with it, and I don’t even know how to use a Tracker. But I can play guitar a little, so I decided to write a music for my own game, because I had about one quarter of a composition made just for fun, which I hoped to turn quickly into game music. I worked in Guitar Pro 5, and everything was OK, but there was a problem: GP only knew how to export tracks in MIDI or WAV formats. WAV, even when compressed into OGG, was just too big. I did not want my music to take more disc space than the rest of the game combined. And both irrKlang and Allegro couldn’t play MIDI files. So, I set up the following process: export a track from GP in MIDI format, load it up in MPTracker, export it into IT format. And it worked.
The first track I wrote, which is now used during levels, was written based on a memory of PC Speaker music from DOS game Prehistorik by Titus. Later, I was unable to find the exact piece that I thought I remembered, but I think it’s a part of 3rd level’s music, the forest one.
The second track, played in menu, is based on instrumental rockabilly track “Mohawk Twist” by Jackals. I don’t think you’ve heard of them. /hipster mode off
You can listen to these track here:
Game Music 1: .it .ogg
Game Music 2: .it .ogg
09.03.12: Began rewriting game’s AI in Lua
The game has no AI, really, because AI should be interactive, it should analyse situation and decide on actions. Here, enemies just behave using simple, pre-defined rules: fly 500 pixels straight, then 100 pixels down, than keep going straight until you’re out of screen. So, this should be called Behaviour Scripts, rather than AI, but it’s too long to write, so I’ll keep referring to AI below, even though it’s hardly one.
In the beginning, AI was defined in XML, just like everything else in game:
<FlyStraight Trigger="Delta_X" TriggerParam="$P1">
    <Random ID="P1" From="100" To="900"/>
</FlyStraight>

<FlyDown Trigger="Delta_Y" TriggerParam="100">
</FlyDown>

<FlyStraight Trigger="Forever">
</FlyStraight>
This was good enough for simple cases. But soon enough, I needed to define enemy behaviours with loops, conditional branching and mathematical calculations. Implementing it all in XML seemed like an extremely bad idea, so I ripped out all the old AI code, and integrated Lua and Luabind instead.
Still, I wanted to keep the principle: every line of the script should command a enemy to take some basic action (fly straight, fly up, fire etc.), and keep doing it until some trigger condition is satisfied. To make this work in Lua, I used co-routines and Lua threads.
Co-routine is a thing I always lacked when I was writing scripts. It’s a function that can be interrupted in the middle, returning control to caller, and resumed at a later time with its state completely preserved. You can write co-routines in C (thought not in a cross-platform way and with some limitations), and there is talk about the next C++ standard having built-in support for this mechanism. But Lua always had them, and they are easy to use there. There is just one slight problem: when you exit from a co-routine via yield (so it can be resumed later), it saves its state in Lua state. Which will be overwritten if we run another script in the same Lua Virtual Machine. You could create a separate VM for every script you run, but this is way too expensive, and there is a better solution: Lua threads. Lua threads are not threads in platform sense, i.e. they are not executed in parallel using platform-specific threads. Instead, they just allow you to create lightweight copies of a Lua state, which is what I needed.
In the end, my new AI looked like that:
function height_change_up( context )
    local dx = RandomInt( 100, 900 )
    local dy = 100

    context:Control( Context.IDLE,		Trigger_DX( dx )			)
    context:Control( Context.CTRL_VERT_UP,	Trigger_DY( dy )			)
    context:Control( Context.IDLE,		Trigger_Eternal()			)
end
I think you’ll have to agree that this is way better than the XML example above. Here, all context functions are defined as ‘yield’ in Luabind, and return control to calling C++ code. The script will be resumed after Trigger condition is satisfied.
A few words on Luabind. I will not discuss here its merits or downsides, or its call overhead, but I must warn you to stay away from it for one reason: it could be hard to get working on the modern compilers with C++11 support, as the original author abandoned development long ago, and all known forks aren’t much better off. So, if you’re looking to integrating Lua and C++, try to find some other library, even if it’s slightly less functional than Luabind.
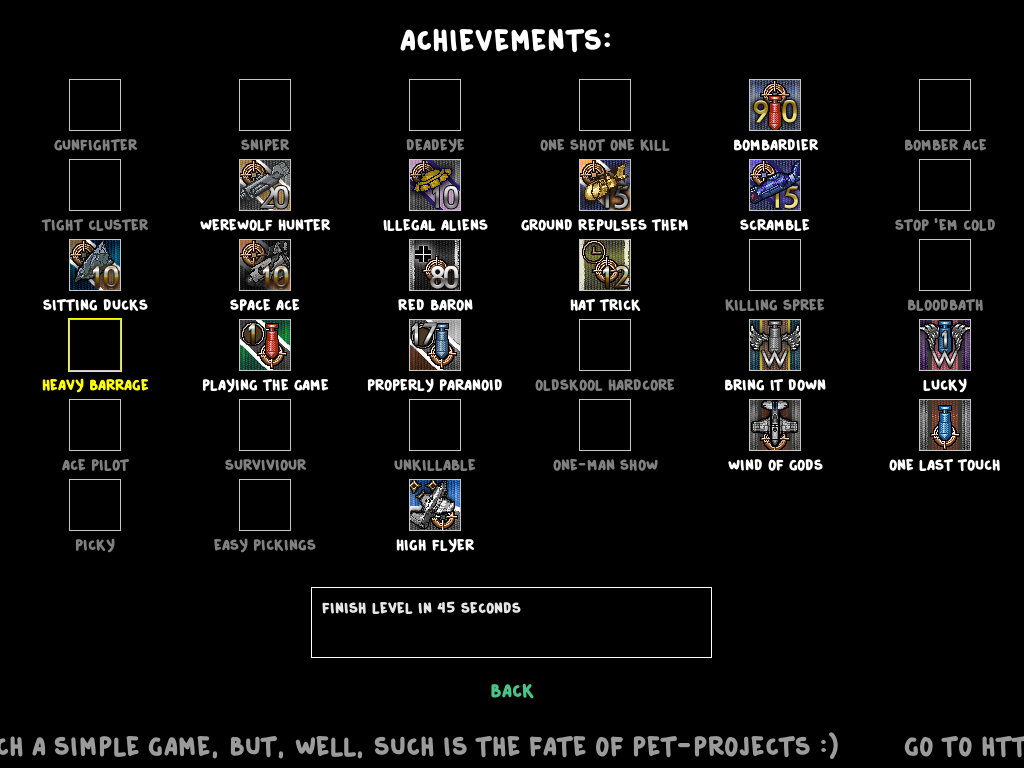
19.04.12: Added counter for Achievements
I don’t remember now the motivation for adding Achievements to this game. I think I did it to force player to abandon the usual, safe tactic and try something different for a change. For example, the “High Flyer” achievement requires the player to spent much time in the upper half of the screen during one of the later levels. This is really hard to do, since upper half of screen gets crowded with enemies, and the usual tactic for players is to fly low, and make occasional jumps, like a bird hunting flies, to attack choosen targets from below.
I never wanted to add any integration with social networks, but I planned to have an option to render all player’s achievement into a PNG file, which could be posted (by hand) on a forum, or published to Facebook or Twitter, is he’s so inclined. In the end, I removed that feature, and I don’t think anyone would miss it very much.
01.06.12: RELEASED VERSION 0.9
0.9 was the last version with the old sprites. It was a fully functional game, with all levels, enemies and achievements in place, thought without gamepad support, and limited to Windows. After that, the most active and interesting period of development has ended, and I started looking for an artist to create the new sprites. I wasted around half a year before I teamed up with Oleg Pavlov, who stunned me with his first drafts of ships.
But at first I tried to make the new sprites myself:
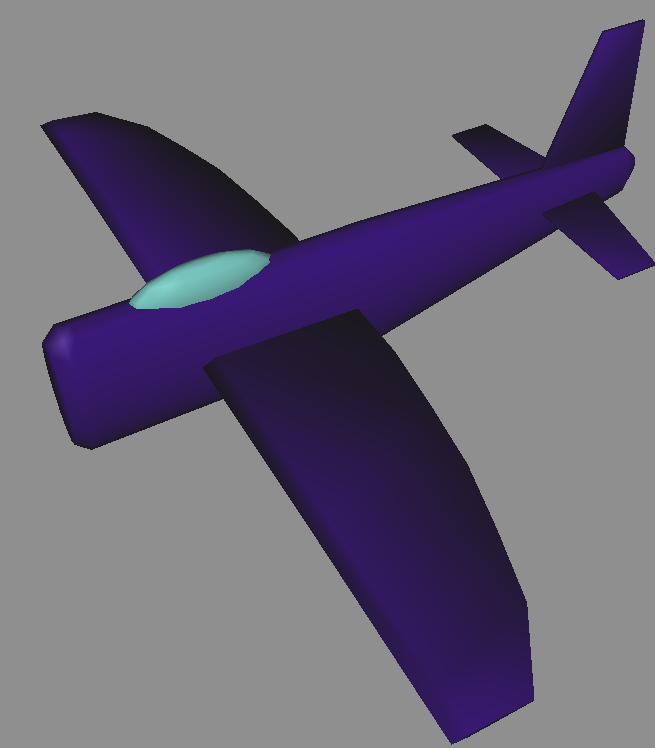
Player’s aircraft, modelled in Wings3D (I believe this is the most programmer-friendly 3D Modelling Program). I think it’s actually kind of nice, but not nearly good enough

An attempt to create a new sprite for the first level’s target ship. Once again, you can’t quite it really ugly, but it’s just not what I would have wanted to have in game
27.07.12: Started work on tutorial
Playtesting showed that players often did not understand the goal of the game. Some thought that you have not to sink, but to protect level’s target. Layer, I remembered that I, too, was confused a bit by the game’s mechanics back in ZX Spectrum days, but I played with it until I understood it, and so it became obvious to me. But not for others. And in our modern times, if the players don’t understand the game, they will just abandon it.
So, I decided to add a tutorial into the game. Usually, tutorial is one of the most ugly and hack-ridden parts of the game, because it intrudes into mechanics and UI in unexpected ways. I took part in coding a tutorial mode in some games before, and I really didn’t want to repeat that experience. So I settled for the simplest form of tutorial I could come up with, with just some frames to attract player’s attention to details, and text to explain them. Of course, the usual wisdom is “show, don’t tell”, but creating such tutorial would take too much time and resources.
So, in the end, the tutorial mode was created quickly enough, and without intruding into mechanics. Later, in 2014-2015 I had to do some more work on it, to show control scheme to player, because I saw no way to make it obvious.
18.08.14: Started work on gamepad support
19.08.14: Gamepads work in game now
Bwa-ha-ha. Sure, it “worked”… Don’t get me wrong: Allegro made it possible to add gamepad support without too much hassle. Unfortunately, there are some things it couldn’t have done for me. For example, at first, gamepad buttons in Options/Controls menu looked kind of like this: “Fire: Button 11”. Also, I had to draw a control scheme for gamepad in tutorial, so I needed to know, WHAT is this “Button 11”. Is it a regular button? Is it a trigger, or D-Pad direction? Some games leave it at that and present player with cryptic messages like “Press [Button 11] to fire”, but this is just lazy and bad, because the player has no way of knowing which button on his gamepad was assigned index 11 by XInput, or some other input API.
On the other hand, there is no cross-platform mechanism to identify buttons and axes, to translate “Stick 2 Axis 1” to “Right Stick, Horizontal Axis”. The problem is partly solved in SDL with a cross-platform database of controllers, but unfortunately there was no way to make Allegro compatible with it due differences in handling joysticks.
Also, every desktop OS has at least two APIs to work with gamepads, each one with its own problems.
In Windows, we have DirectInput and XInput. Allegro abstracts them away with its own layer, and removes useful XInput-specific information in process, so a constant “XINPUT_GAMEPAD_A” reported by XInput becomes much-dreaded “Button 11” when it reaches my code’s level.
In Linux, I only managed to get my Logitech F300 working in XInput mode. However, it wasn’t working perfectly: triggers were behaving badly. Some investigation led me to discovery that, under Linux, triggers have values from -1 to 1, with -1 being the neutral, while in Windows they go from 0 to 1. I was unable to derive the reason for this from driver’s code, even though it contradicted Linux’s own documentation, which states that ABS triggers should report positive values only.
In MacOS X, there is a new, modern API that supports XInput gamepads. However, for unexplained reasons, it doesn’t support Start and Back buttons (to say nothing of Guide/X-Box button). And Allegro doesn’t work with this API anyway. The old method of working with gamepads, used by Allegro, via HID Manager, is full of black magic. I had to fix a bug in Allegro, which led to D-pad not working at all, but after it my gamepad was working (in DirectInput mode only, though – praise to Logitech for including a XInput/DirectInput switch in this model!).
By the way, if you start digging into gamepad-related code, you might wonder, why does values from the right stick are reported via GD_Z and GD_Rx axes, and not, say, GD_Rx and GD_Ry. That’s because ‘R’ in this case doesn’t mean “Right”. It means “Rotational”. USB HID API doesn’t actually support two-stick gamepads. There are no constants for the second stick in it. But it supports flight controllers, which have only one stick, but it can has much more than 2 axes. So, hardware designers cheated a bit, and used the first four axes’ constants, disregarding their intended puprose.
03.09.14: Moved building process to CMake, restructured repository
At first, the game could only be built in Visual Studio. When I wanted a Linux version (around version 0.9 or earlier), I found a program called MakeItSo, which converted Visual Studio solution files into Linux makefile. I had to fix it by hand after that, but it was working, more or less.
But I wanted to support at least three main desktop platforms, and possibly two or three mobile platforms in the future. So, I decided to use CMake. My experience with this project-generation system was mostly positive. The only bad thing I have to say about it, is that it’s too slow to support new platforms that has been added to Visual Studio in the past few years, like Android (via NSight Tegra plugin) or Emscripten. There is no way to pass necessary parameters to these kinds of projects, and CMake authors refuse to support adding Property Sheets to VS projects on ideological basis (which is plenty stupid, if you ask me, because it would solve a lot of problems). Also, app bundle support on MacOS X is implemented somewhat poorly, for example, you have to set EACH file’s location in bundle, you can’t set this property for the whole directory.
27.10.14: Integrated Google Breakpad
I have written a separate article on Google Breakpad integration in this very blog, so I won’t go into details here, but I must say that the unprofessional way, in which Breakpad’s codebase is organized really shocked me. The official line is that I should include the whole repository – with about 100Mb of code, tests, documentation and wholly unnecessary files – into my source tree, which is asinine.
Still, I managed to get Breakpad up and running. But I hasn’t yet received a single crash report (beyond the tests I’ve done). Either my game is so stable it doesn’t crash, or the sending of crash reports is broken!
26.02.15: Finished life loss effect
During the testing of the final version, I received a complaint that it was often impossible to tell what enemy has player’s plane collided with. To rectify this, I added a special effect that signified lost life (windshield cracks) and a box with an image of the enemy. This doesn’t help much to tell harmless and dangerous enemies beforehand, but at least it provides more information, more feedback to player.
The cracks effect was inspired by another ZX Spectrum game, Night Gunner.

13.04.15: RELEASED VERSION 1.0
On 13th of April I assembled all builds for all platforms and uploaded them to site. “Return of Dr. Destructo” was released to the wide world. But its story doesn’t end here – I’m still working on mobile versions, so there will be yet more entries in Progress.txt!

The code for the project is available at Github under MIT license
Thank you for your attention!
Hi , don’t you know that where is Razgriz ? S/he hasn’t updated his/her work about 2-3 months and doesn’t reply comments .
Hi, he hit a big hurdle, namely, particle system. Presently, he’s stumped by it, and cannot proceed further.
Then why he doesn’t leave any comments about it or answer any comments ?
I can’t really say. Maybe he doesn’t feel like posting unless he has something new to report, maybe he’s just not in the mood.
I think you are right . Maybe I have to wait longer . Thank you .